Hardware Setup#
This page will walk you through the installation of the MX3 M.2 module into a system.
Important
Install the hardware before installing the Driver/Runtime in order to auto-update MXA firmware. If you install in the opposite order, please run this command to check for firmware updates.
Setup Heatsink#
To use the included heatsink, please follow the video instructions below.
Install#
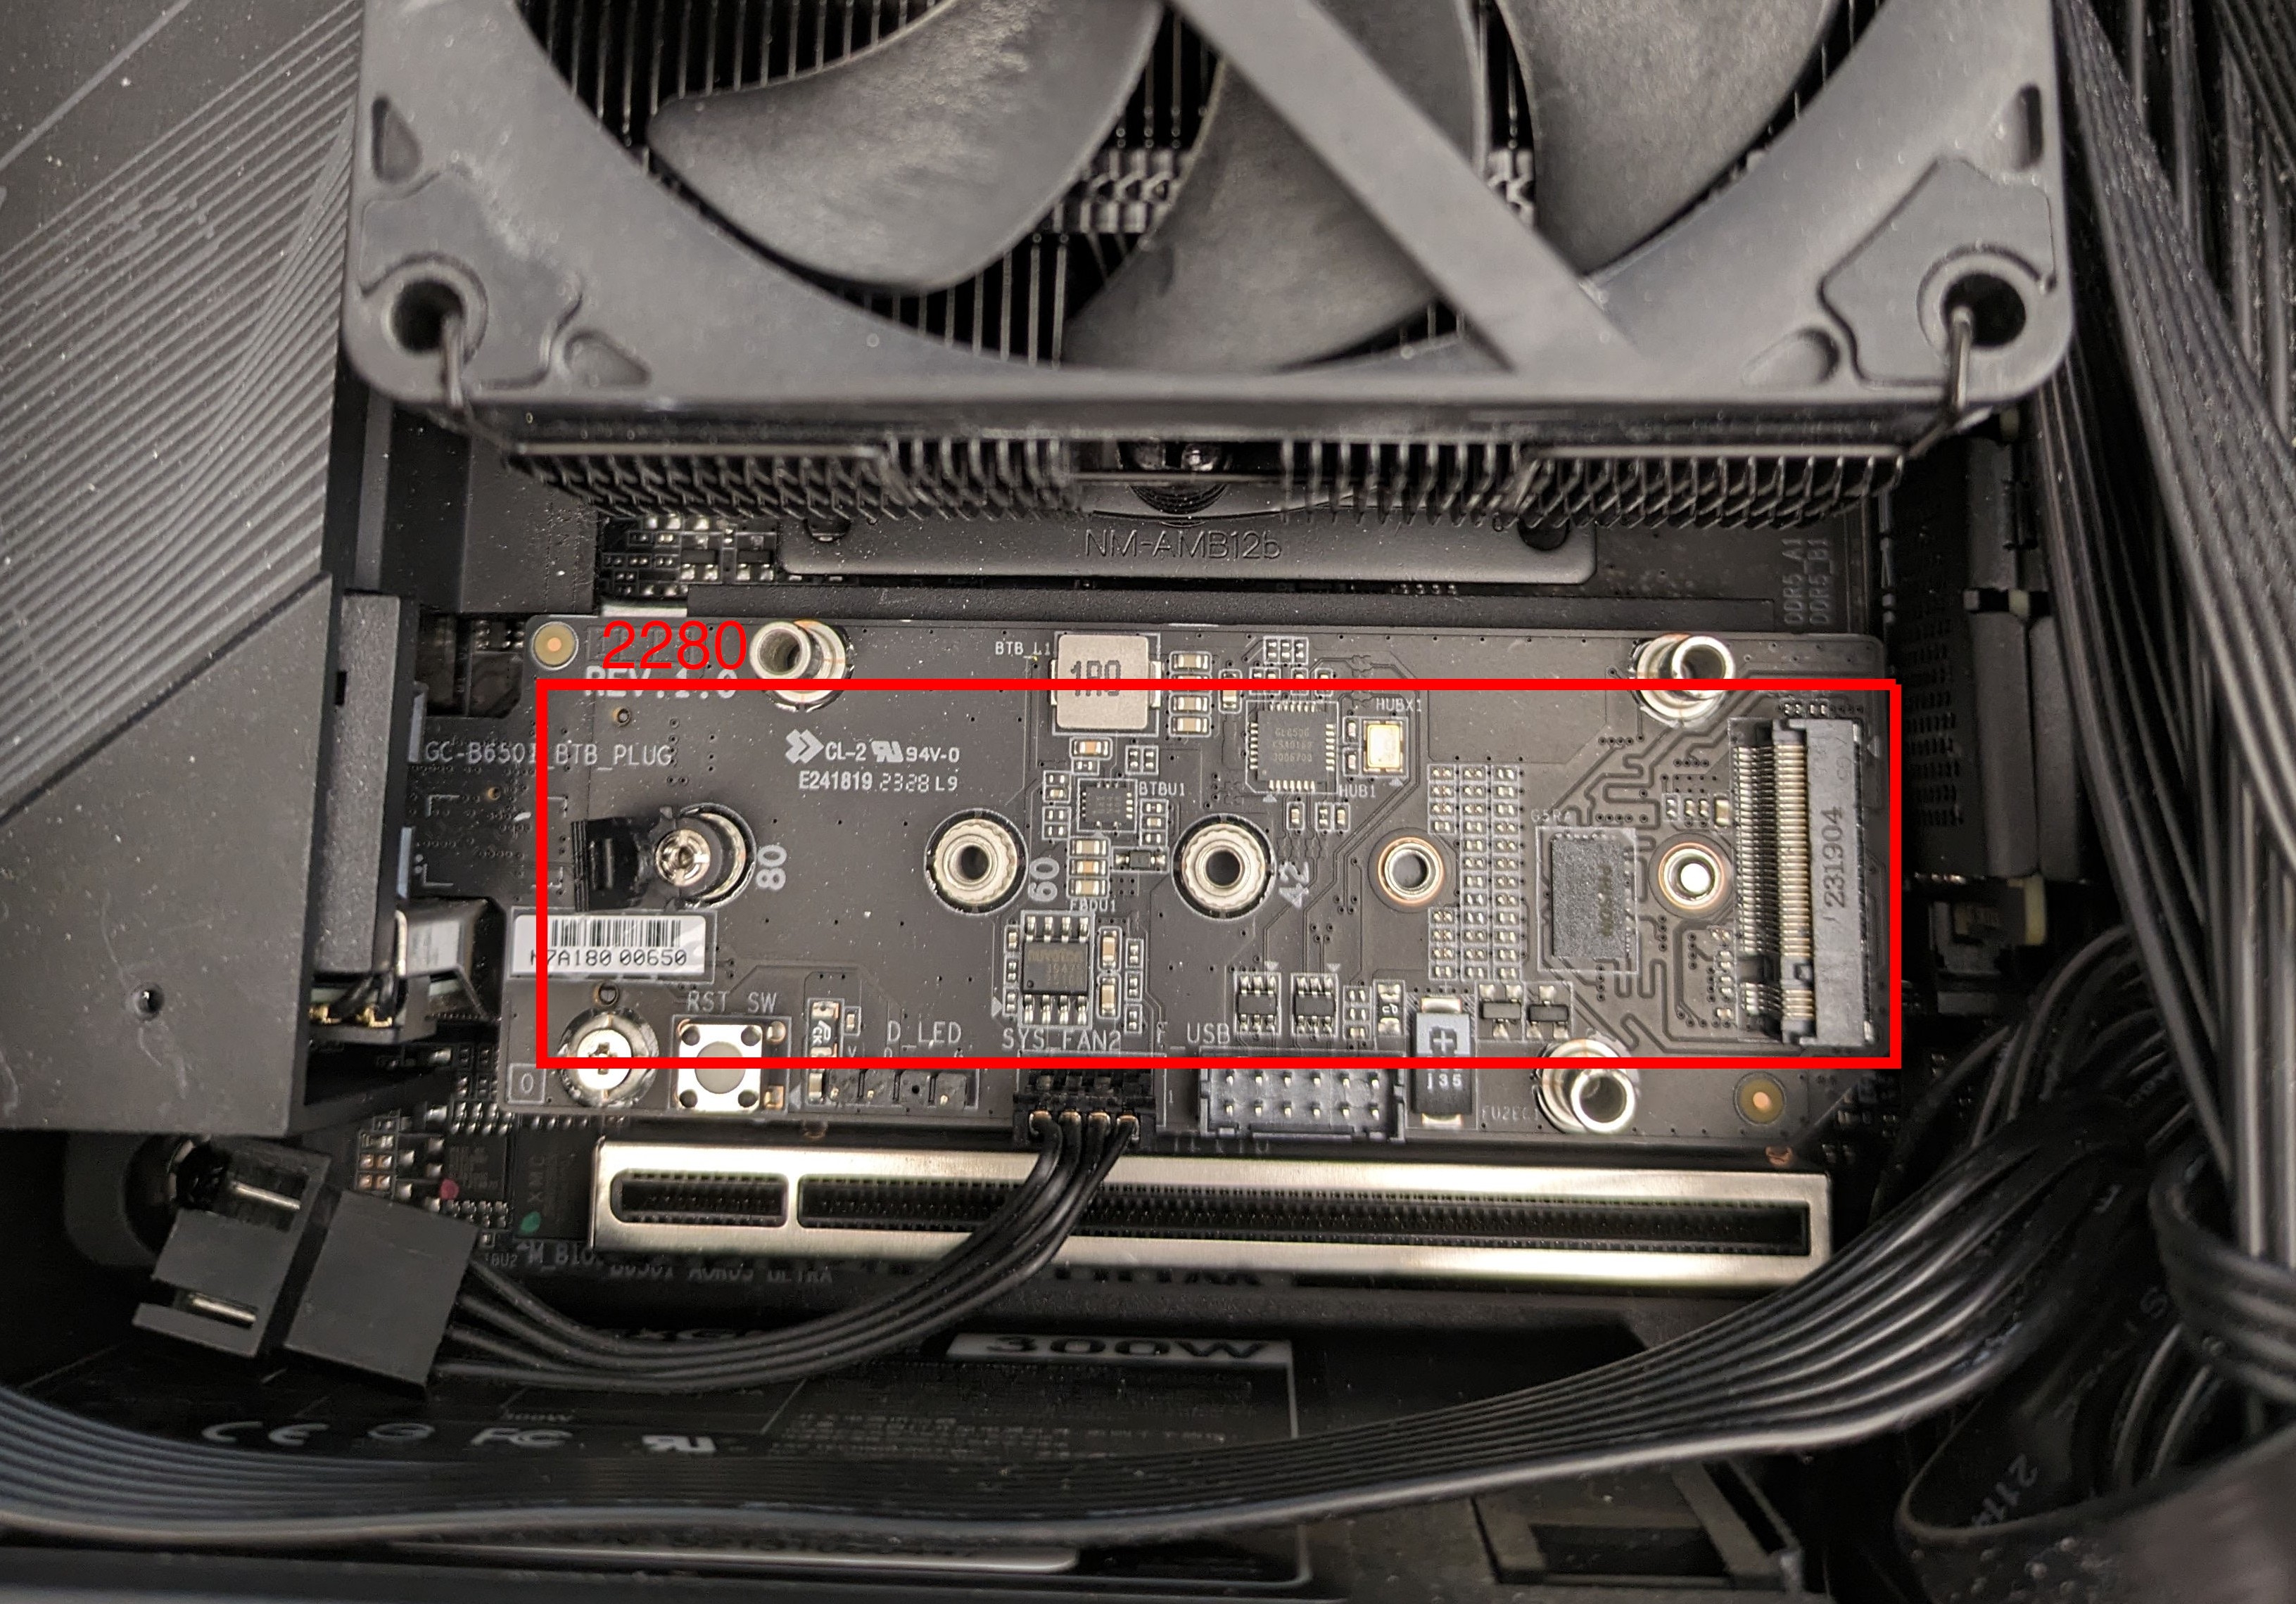
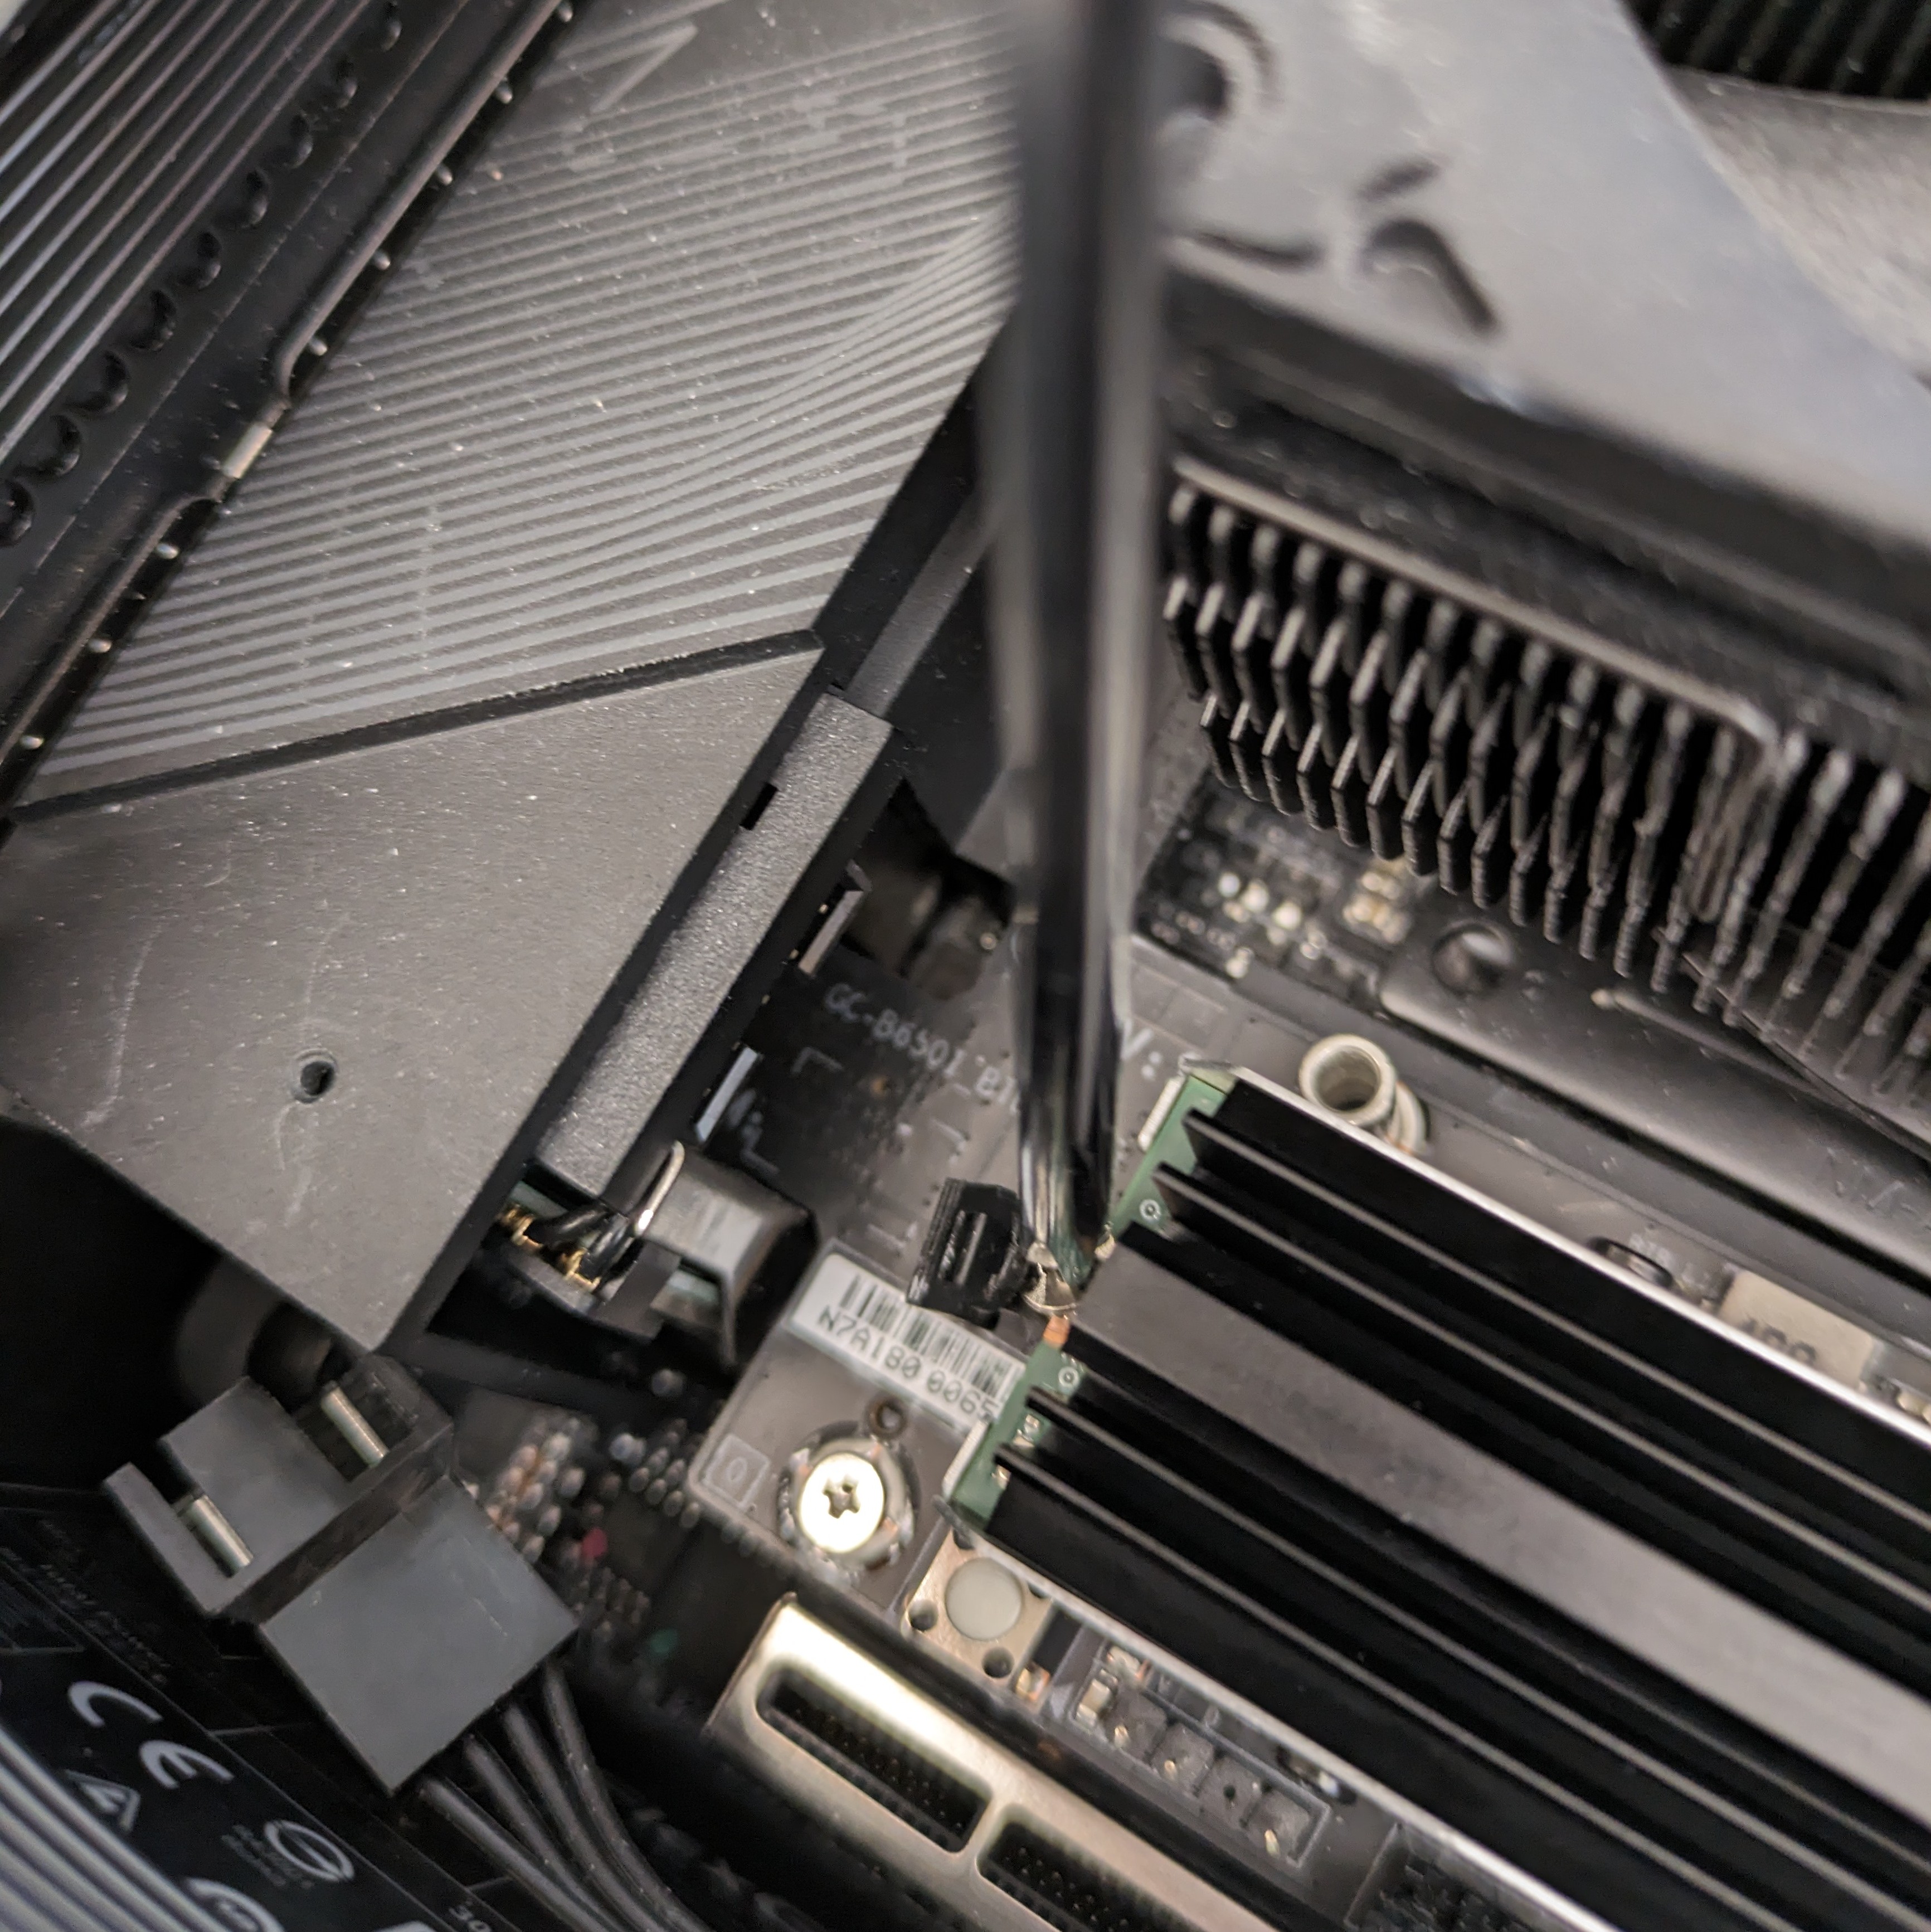
First, locate the M.2 2280 slot in your machine. These are also known as “NVMe slots” or “SSD slots”, since they are often used for storage drives.
View Image
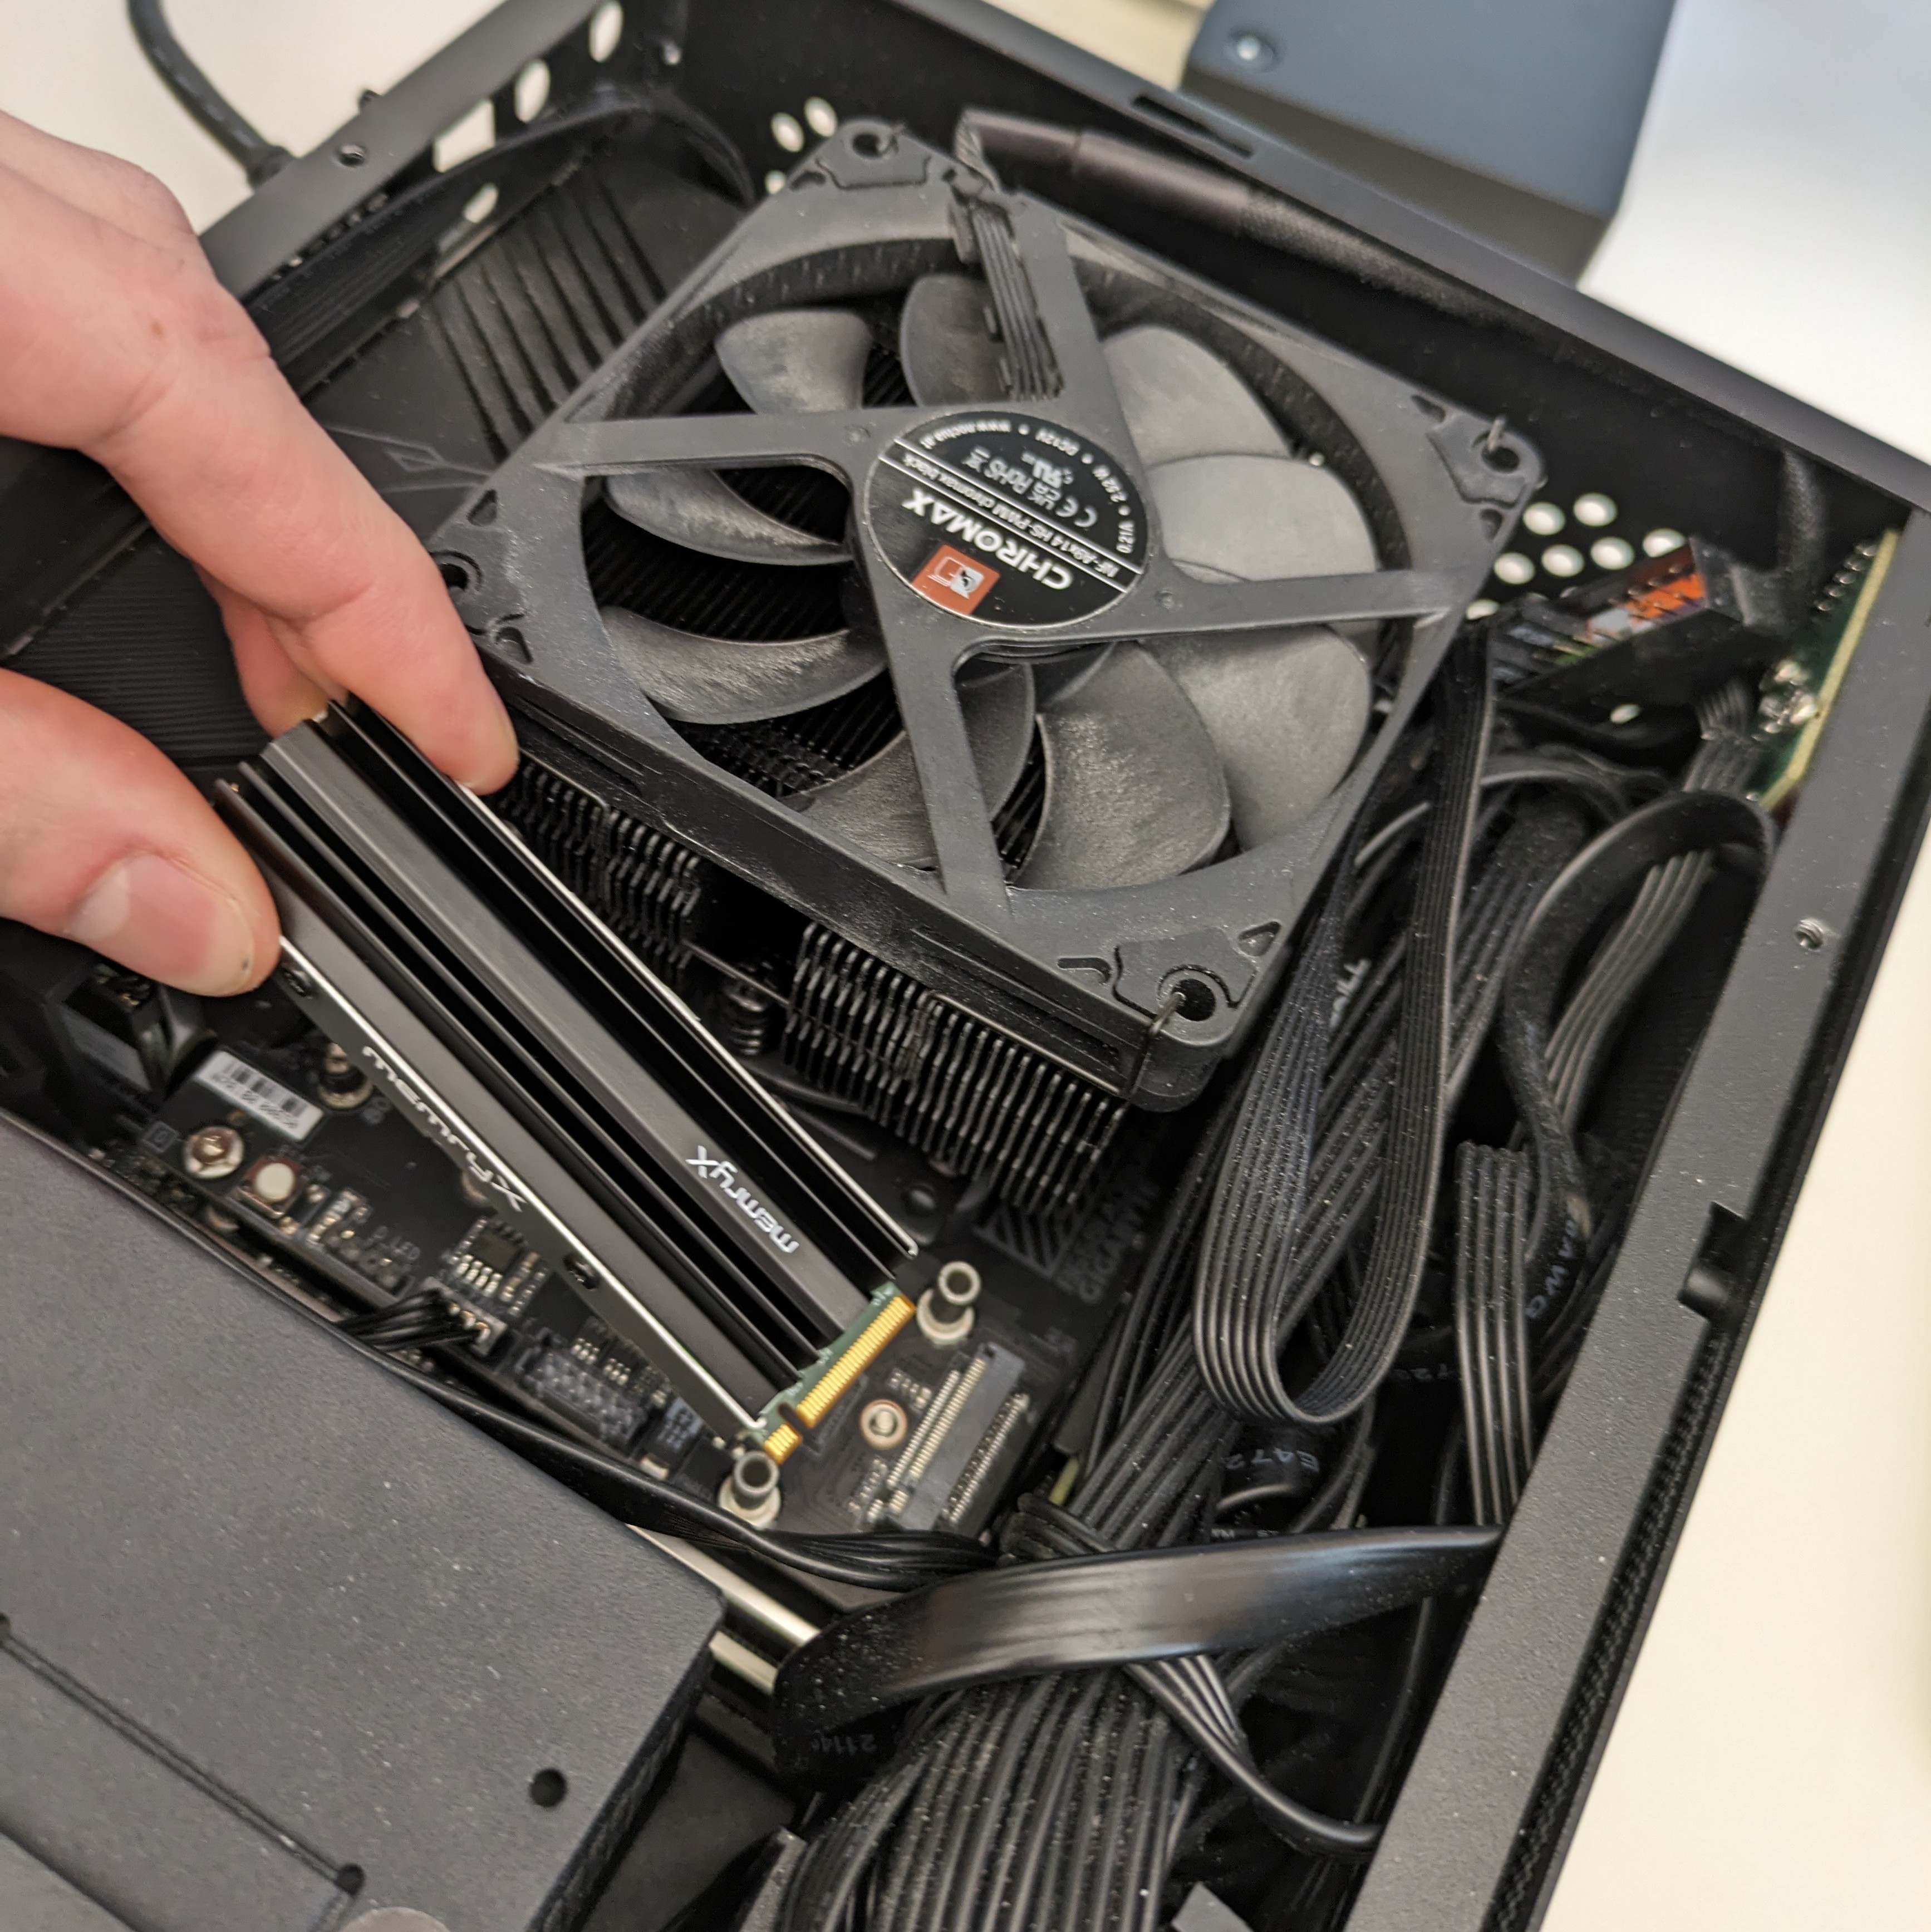
Next, insert the M.2 model into the slot at an angle, and then push it down flat.
View Images
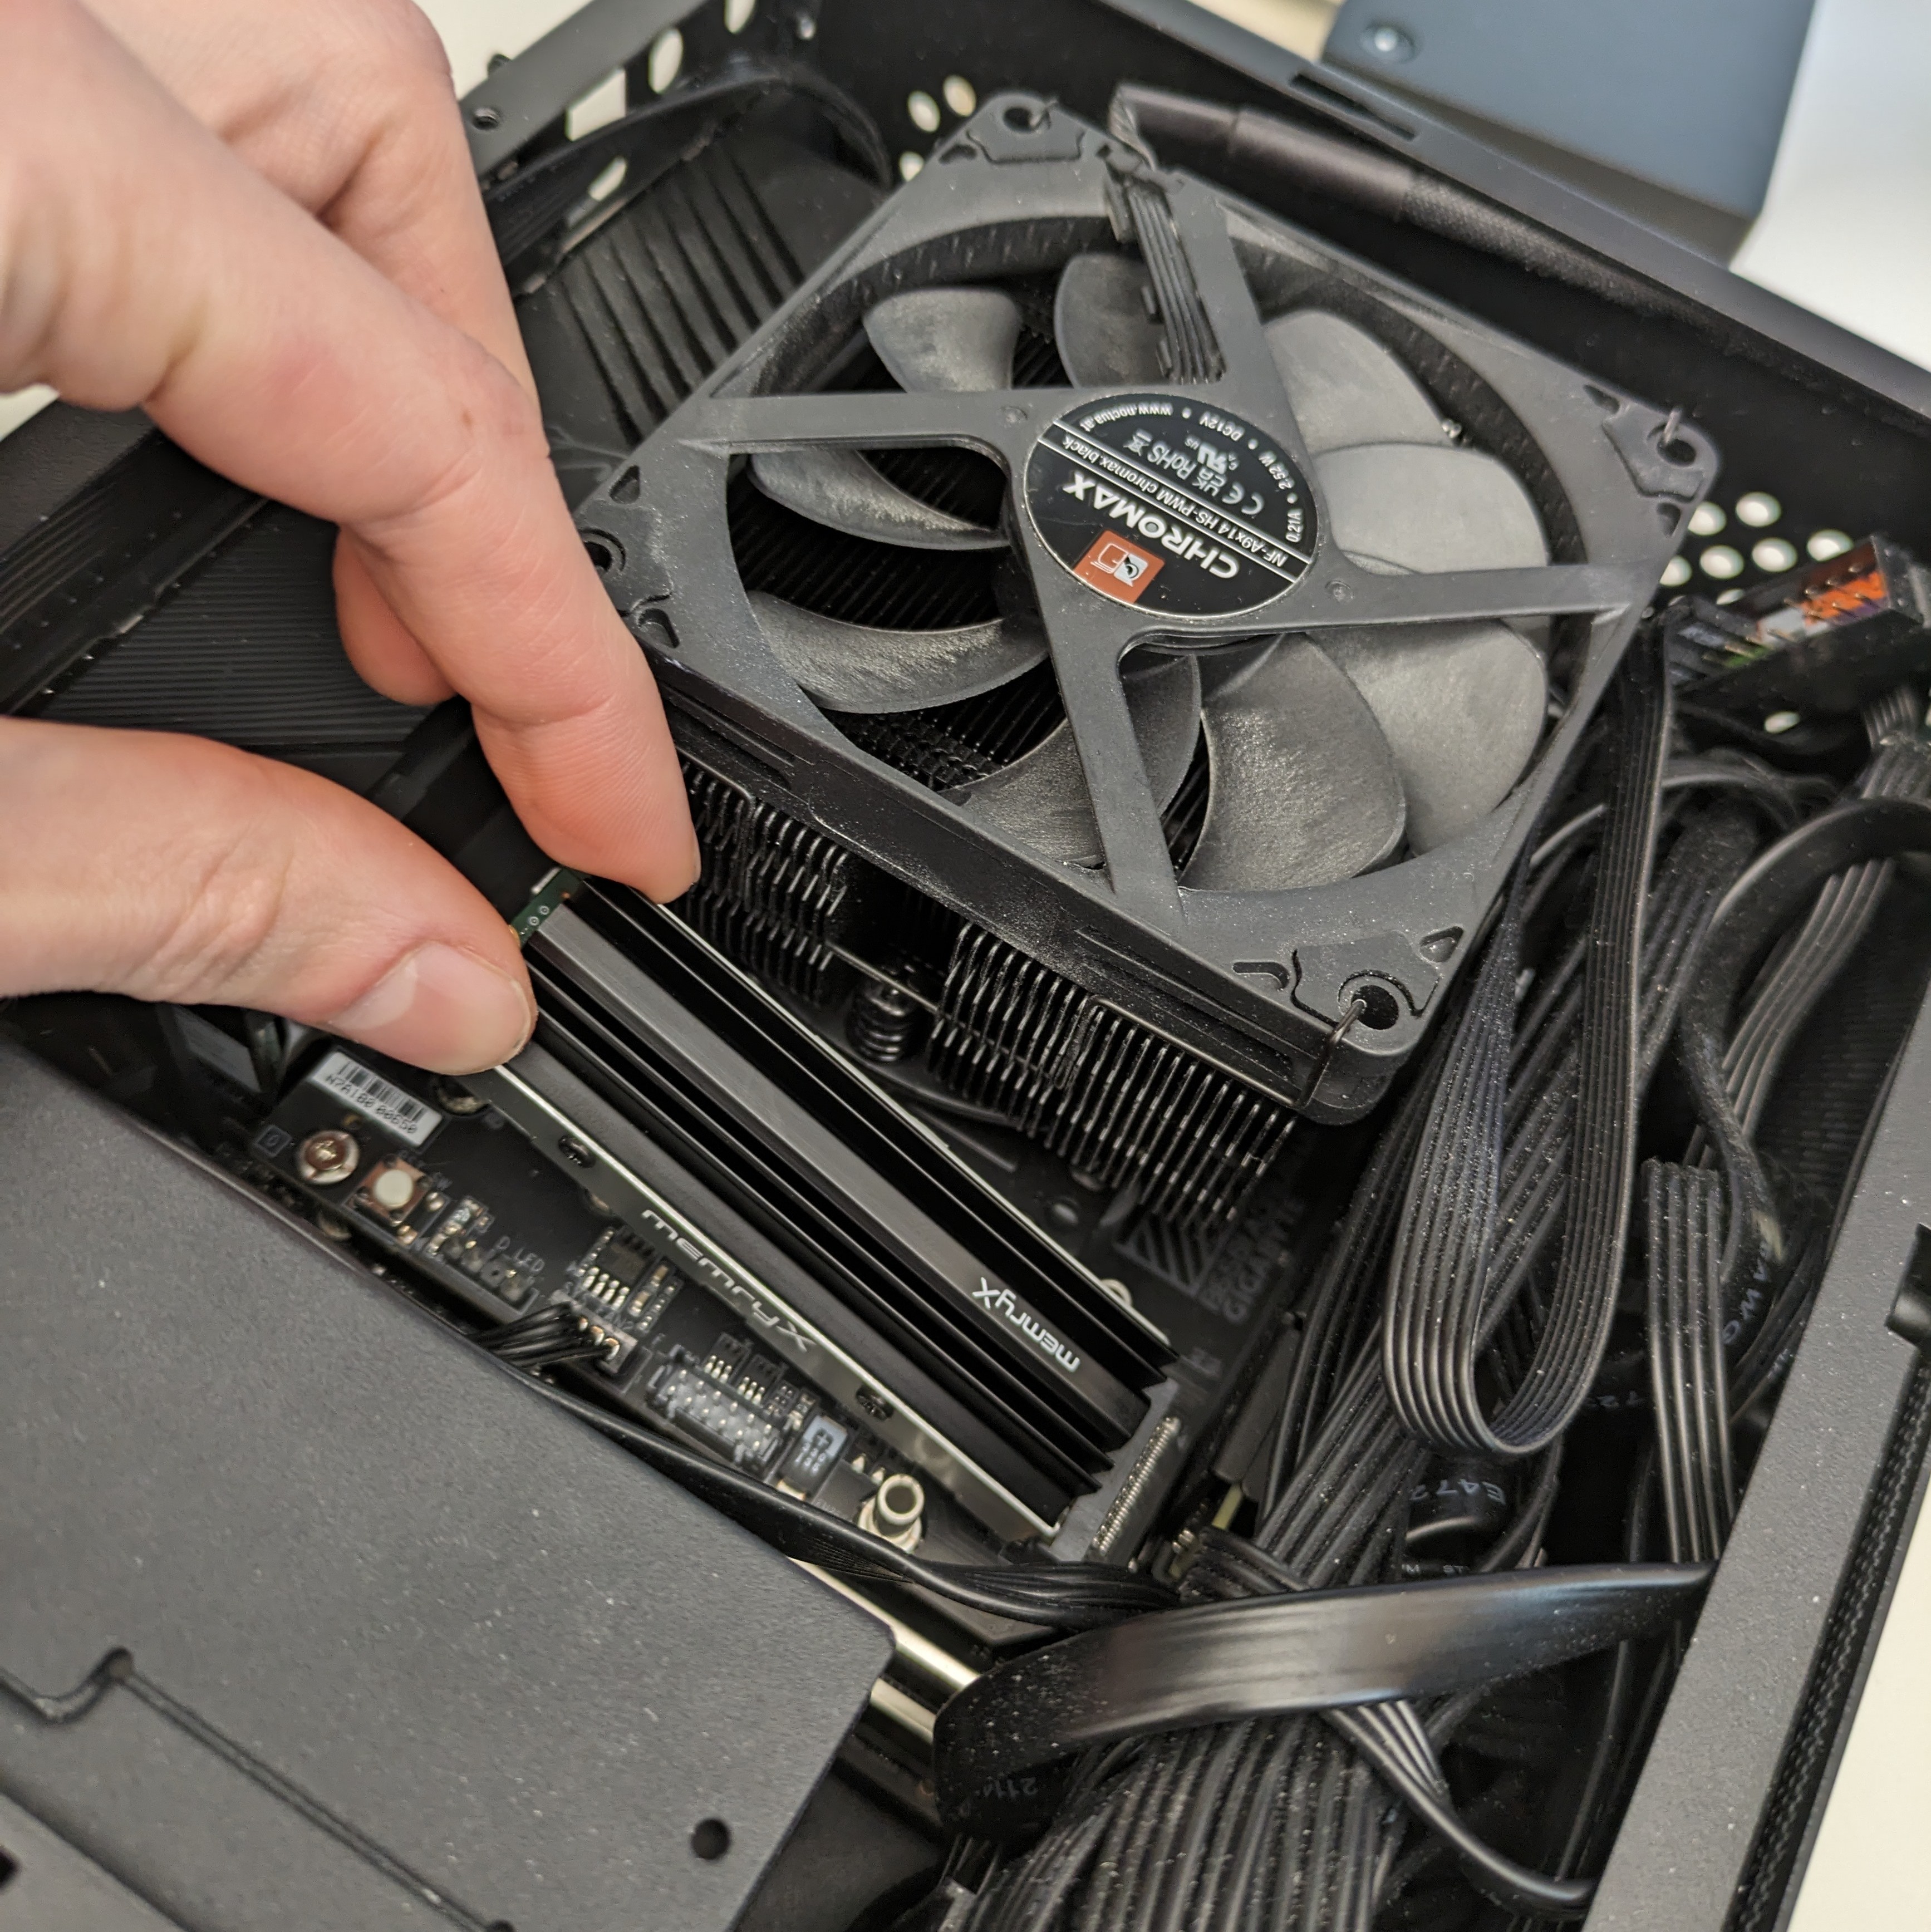
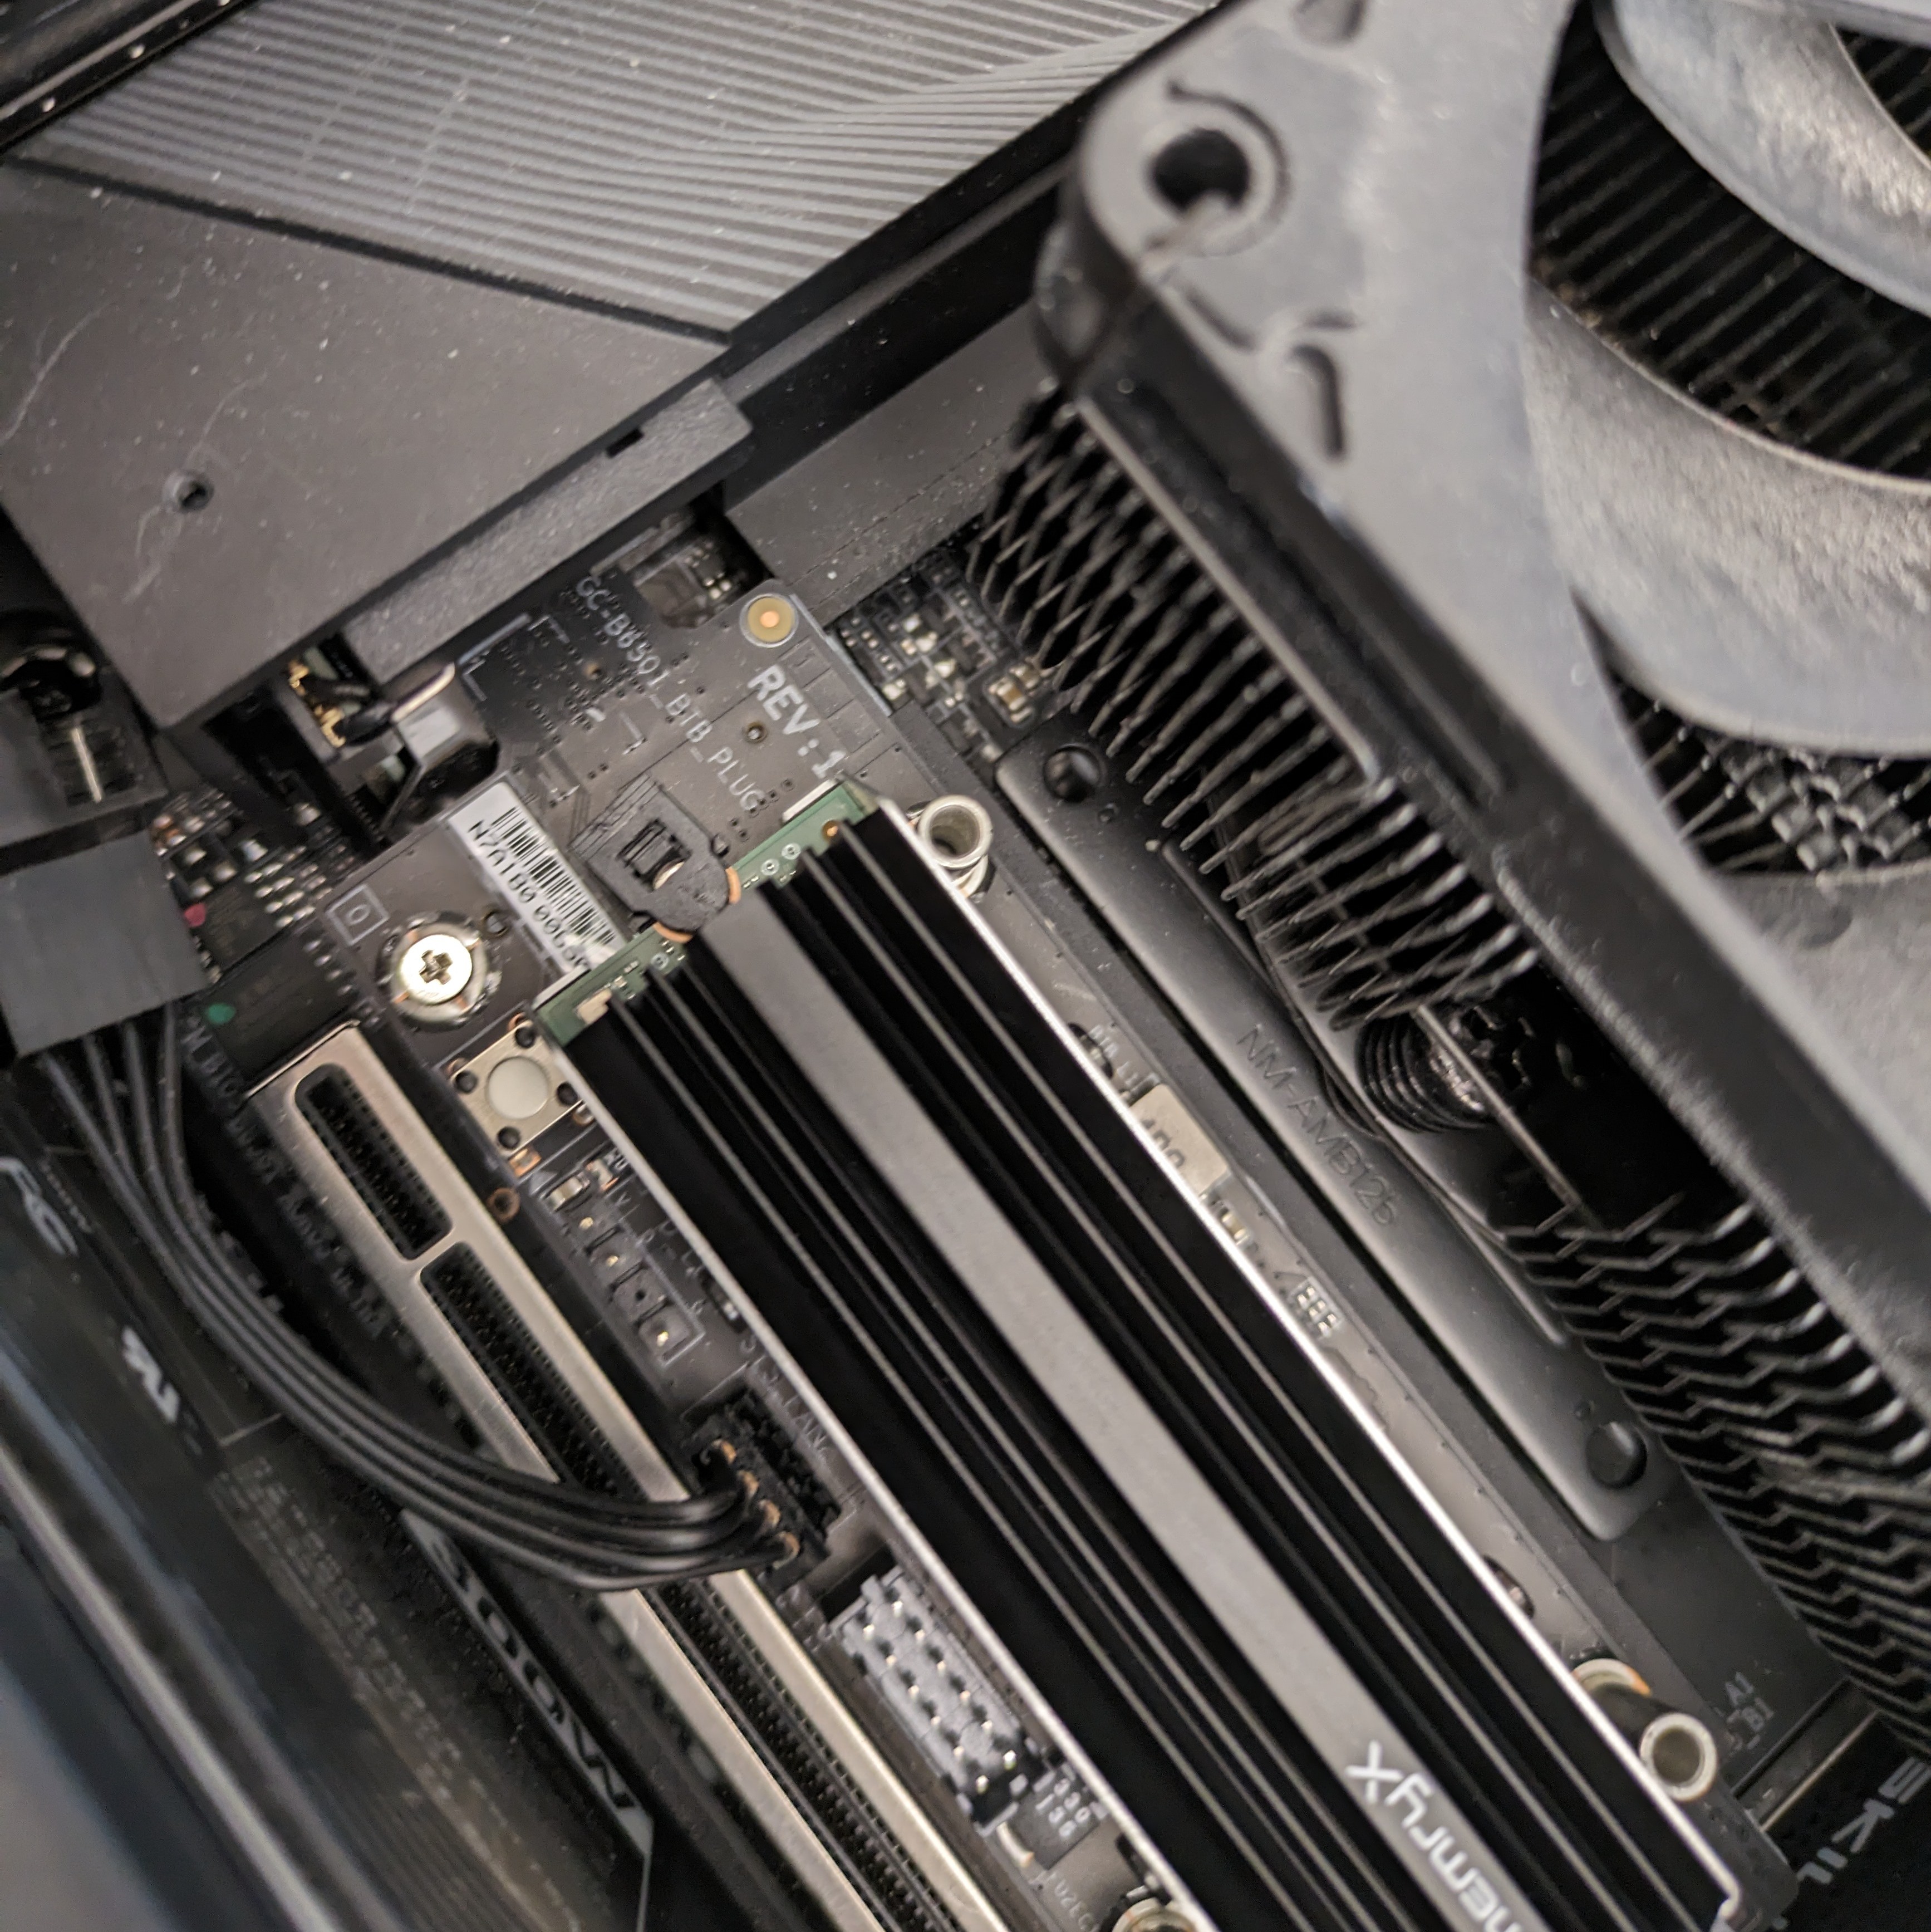
Depending on your system, now either screw the module down using one of the included screws (2 threadings provided), or if your system uses a plastic clip, clip it down.
View Images
(Option 1) Screw:
(Option 2) Plastic Clip:
Airflow#
Warning
Please make sure you have sufficient cooling, or else you may experience thermal throttling / reduced performance. The chips will throttle their performance if they hit 100C.
The current temperature and throttle status can be viewed at any time with:
cat /sys/memx0/temperature
When using the included heatsink, it is strongly recommended to have airflow across the heatsink fins. Even a minimal amount of airflow, e.g. ~3CFM, can significantly improve thermals.
Finalize#
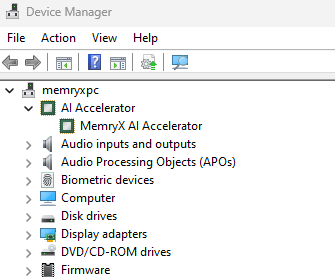
That’s it! With the driver installed, turn the system back on.
To verify that it is ready to use, check for the /dev/memx0 device node on Linux, or the “MemryX AI Accelerator” in Windows Device Manager.
ls /dev/memx*
should return:
/dev/memx0
Open Device Manager.
At the top of the list there should be an entry for “MemryX AI Accelerator” with a green icon.