Install Runtime (Windows)#
Important
Make sure you have Visual C++ Redistributable installed before running the MemryX Installer.
You can download the latest from Microsoft here.
The Windows Driver and C++ Runtime for MX3 are installed using the MemryXInstaller.
System Requirements#
Any Windows 10 or Windows 11 PC with a relatively recent Intel/AMD processor (2014 or later) should work.
Note
Please be sure to setup the hardware before installing the driver and the runtime tools.
Installation#
Download the
MemryXInstaller.Right-click on the file, and select Run as administrator.
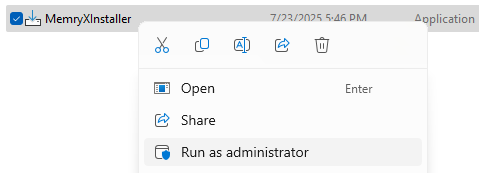
You will be prompted to allow the application to make changes to your device, click Yes.
Click Install to start the installation process and finally Finish when it’s done.
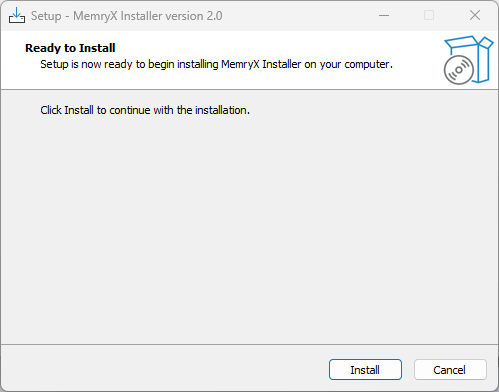
Restart your PC to complete the installation.
Check It Worked#
After restarting, first verify that the driver is loading successfully. Assuming you’ve inserted the MX3 M.2 module (see Install Hardware), open Windows Device Manager, you should now see MemryX AI Accelerator connected:
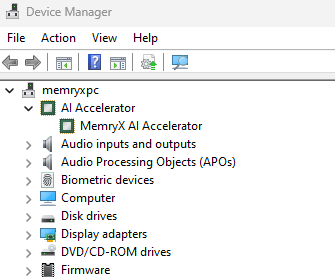
Verify the installation by running the following command:
acclBench --hello
You should see the following output:
Hello from MXA!

Device ID | Chip Count |  Freq | Volt
----------|------------|-------|-----
        0 |          4 |   600 |  700
If the MXA is not detected, run the following command in PowerShell as administrator and try again:
Restart-Service -Name "MxaManagerSvc"
Firmware Troubleshooting#
If the device shows up in Device Manager, but benchmark tools or applications fail, you may need to update the firmware.
Error Message#
In particular, if you see an error similar to this:
Driver required firmware anti_rollback cnt >= X
This indicates that the firmware on the device is out of date and needs to be updated.
How to Update#
To update the firmware, make sure you have the latest MemryXInstaller already installed.
Then, open Command Prompt or PowerShell as administrator and run the following command:
"C:\Program Files\MemryX\tool\update_flash_tool\pcieupdateflash_win.exe" -f "C:\Program Files\MemryX\driver\cascade_4chips_flash.bin"
Upon success, restart your computer and try running again.
See also
Version Check#
Follow these steps to check your installed Windows Kernel Driver version (separate from SDK version):
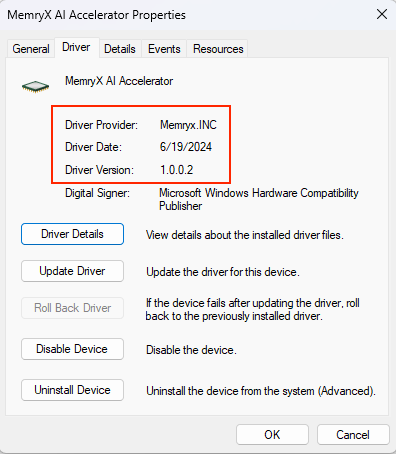
Open Device Manager, locate the MemryX AI Accelerator node, right-click it, and select Properties from the context menu
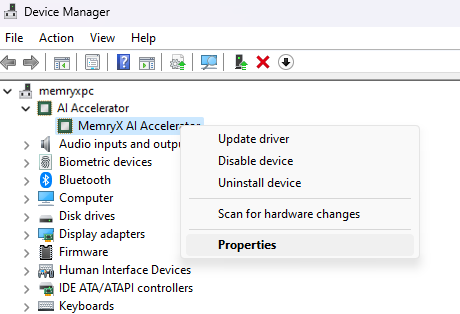
You can see the installed driver version in MemryX AI Accelerator Properties
Run Benchmark and Applications#
To run the benchmark tool and applications on Windows, please refer to the Hello MXA! tutorial.
Upgrade#
To upgrade, simply download the new installer and follow the same steps.
Uninstall Windows Driver#
Run PowerShell as administrator.
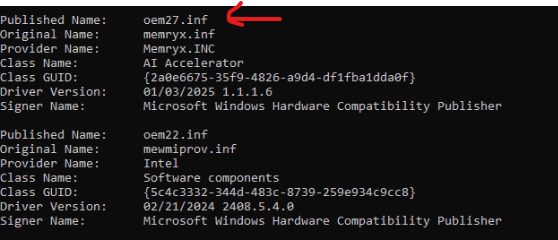
Find MemryX Windows Driver (In this example it is oem27.inf)
pnputil /enum-drivers | Select-String -Pattern "memryx.inf" -Context 5
Remove MemryX Windows Driver
pnputil /delete-driver oem27.inf /uninstall /force
